An Invoice (an ERPNext Sales Invoice) bills a customer for work done. Submitting it posts a receivable. Payments and advances against it reduce what’s outstanding.
Open it from: Project Finance → Invoices
At the top, the list shows the total Outstanding and the Advances held from customers. Each row shows the invoice, customer, project, date, due date, aging bucket, total, outstanding amount and status, with a Receive button on unpaid invoices. You can filter by status and project.
Create an invoice
- Click + New invoice.
- Select the Customer, and the Project if the income belongs to one.
- Set the Invoice date and Due date.
- Under Items, add each line with its description, quantity and rate.
- Under Taxes & Discount, pick a Tax template or add rows. If needed, add a discount as ₹ or % on the Net Total or Grand Total.
- Add the terms and click Create invoice. Check it, then Submit.
The invoice page
The top shows the invoice and due dates, the status and the payment status. Cards show the Customer, Project, Invoice Total and Outstanding. Below them are the items, the Receipts recorded against the invoice, the linked Advance payments, and the totals.
Actions are Print / PDF, Receive payment and Cancel. If the customer has an unadjusted advance, a banner says so. Click Link advance to set it against this invoice.
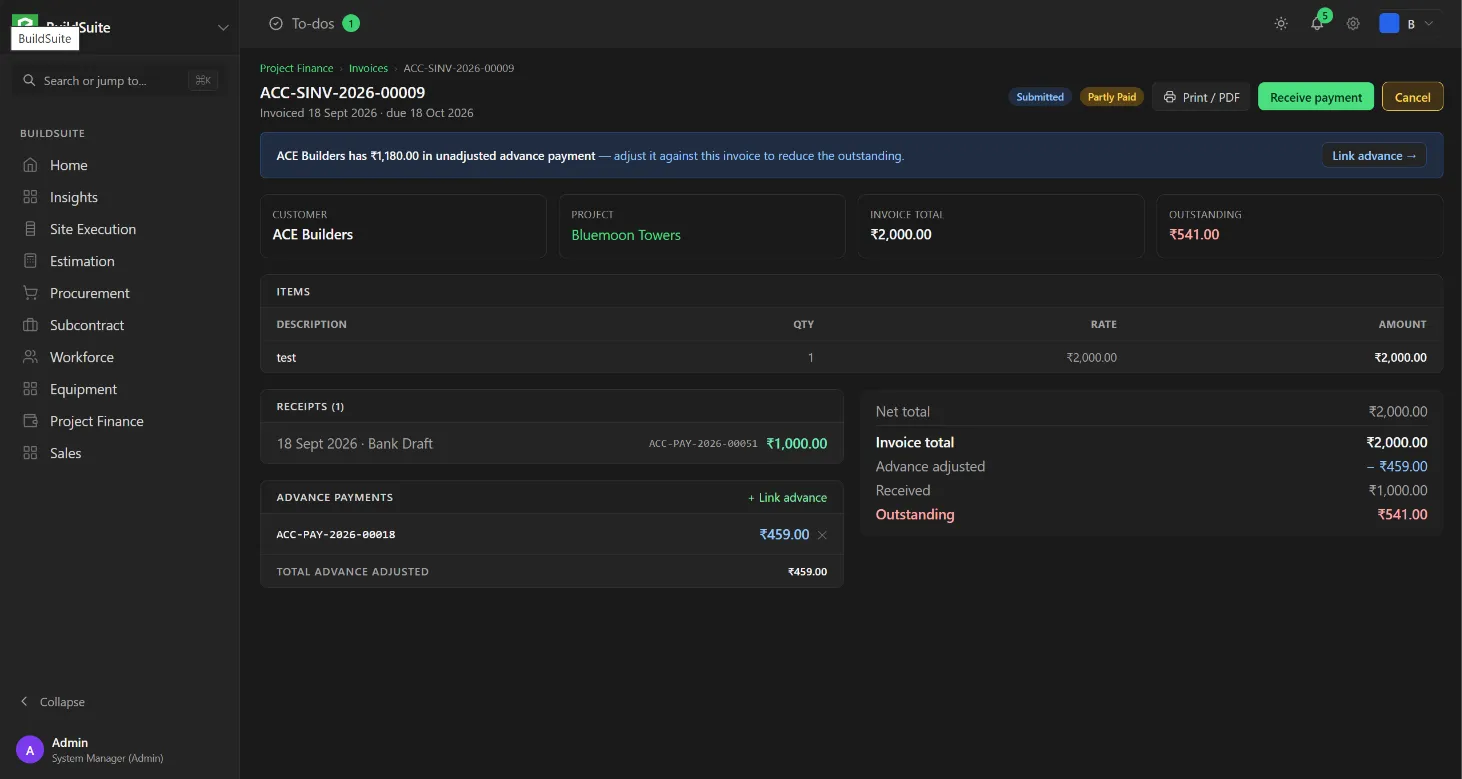
Example: Invoice total ₹2,000. Advance adjusted ₹459, received ₹1,000, so the outstanding amount is ₹541.
Status
Draft, Unpaid, Partly Paid, Overdue (past the due date and not fully paid), Paid and Cancelled.
Advances
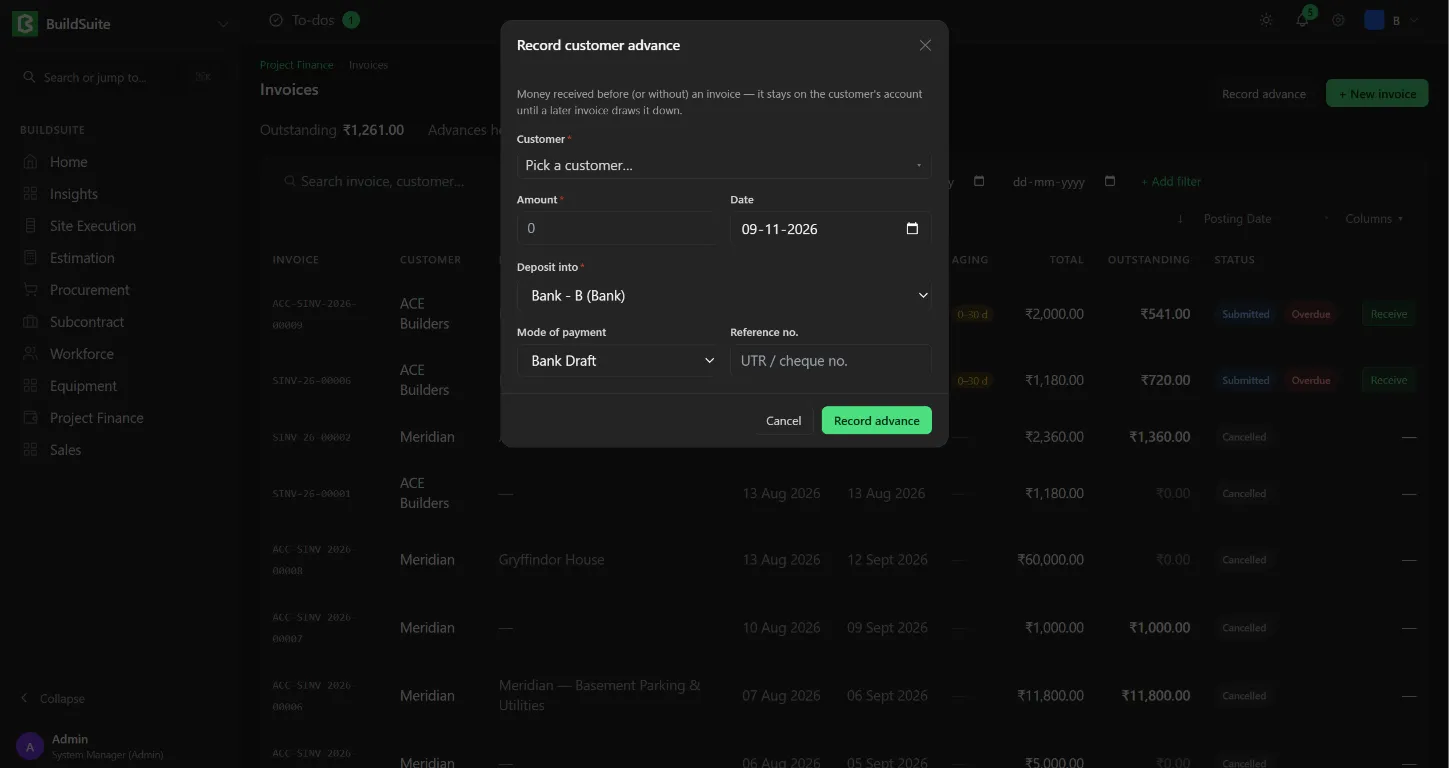
Click Record advance to record money received from a customer before invoicing. It is held against the customer and can be linked to a later invoice.